Repair the Syma X12S quadcopter by replacing the motors and rotor blades (and what to do if it does not lift off afterwards)
 My friend owns a Syma X12S quadcopter that was cheaply imported from China. It really is an amazing piece of hardware and the perfect entertainment when you spend an evening with friends. Piloting this miniature aircraft is quite easy – it only takes a few flying sessions until you acquired enough skills to handle it. However, I still managed to crash the quadcopter in a way that damaged two of its four motors. The beauty of this toy is its modular design: Even though it is a cheap product, most of the parts are LRUs, so you can simply order a replacement for the defect part and replace it yourself.
This short post shows how to replace the motors of a Syma X12S quadcopter and highlights some difficulties to look out for.
Replacing the motors
The Syma X12S quadcopter has two pairs of motors, two spinning in one direction and two spinning in the opposite direction. Both motor pairs are placed diagonally in the quadcopter mount positions (see items 04 and 05 in the exploded assembly drawing below). This design concept accounts for the spin moment of each rotor, assuring an equilibrium on the overall spin moment.
 Replacing any part of this quadcopter model is straight forward, even for people that are not so technically gifted: The only tools needed are a small Phillips screw drive and basic soldering equipment. To get access to the motors you only need to remove three parts. First, the rotor blades of the motors need to be removed:
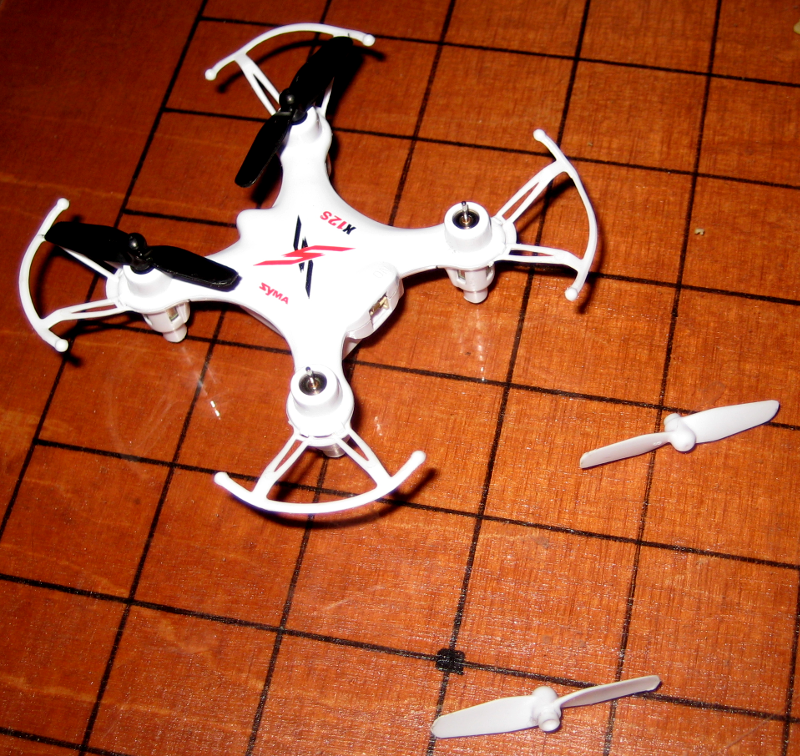 They are simply pushed onto the motor shaft, creating a frictional connection. So just reverse the process by pulling them off again. Do not pull on the blades, as they bend and break easily. Instead grab the rotors at the hub.
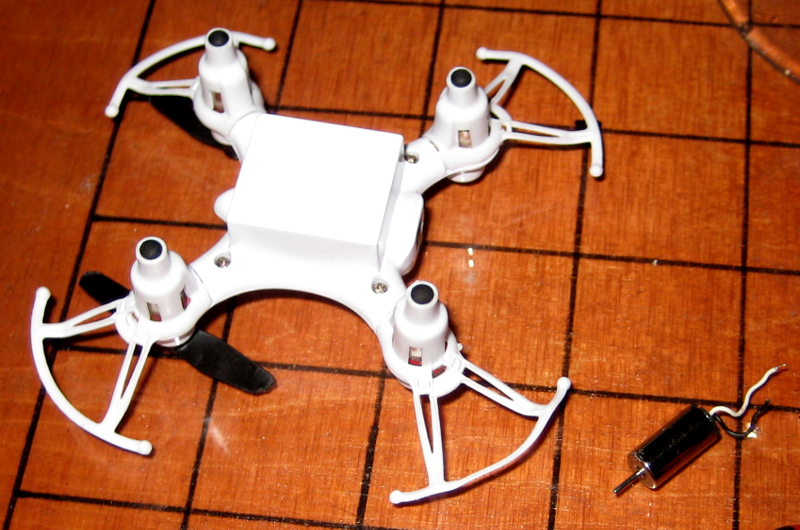
Next, the bottom cover plate needs to be removed, which is held in place by four screws:
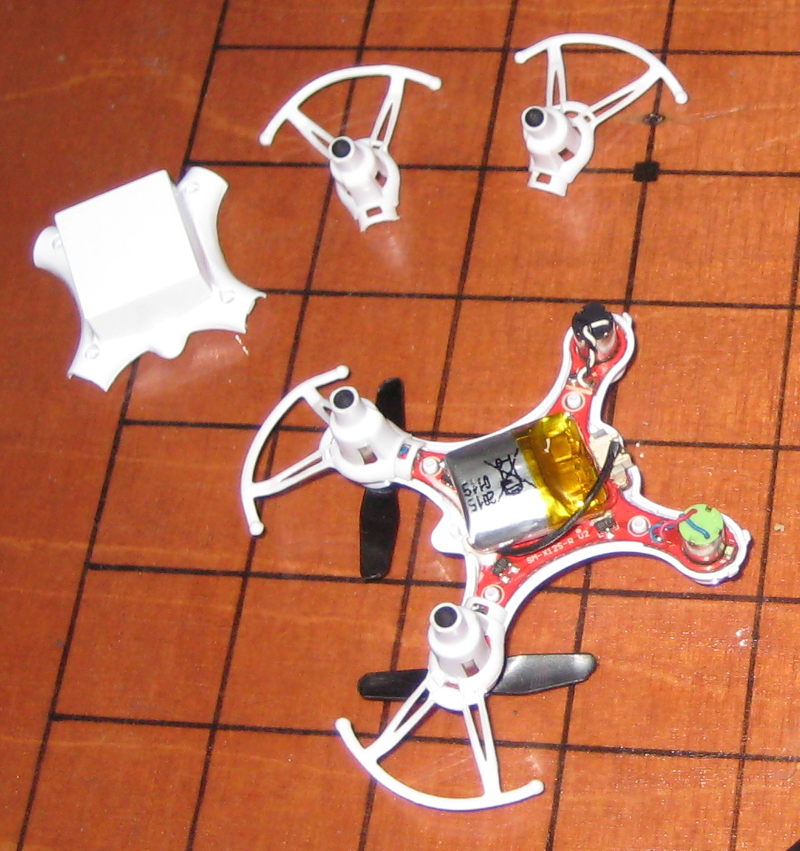
 Then, remove the chassis parts that cover each motor, which serve as a rotor blade protection and landing gear. Only remove the one(s) on the motor(s) you want to replace. This is probably the most delicate step: Theses parts are kept in place by two tiny clips each. Removing the part without breaking the clips requires a little patience and a steady hand – I ripped one off right away. If you break one of the clips, the part will not be held in place anymore after reassembly (later in this guide). Applying adhesive or a tiny drop of hot glue will fix this.
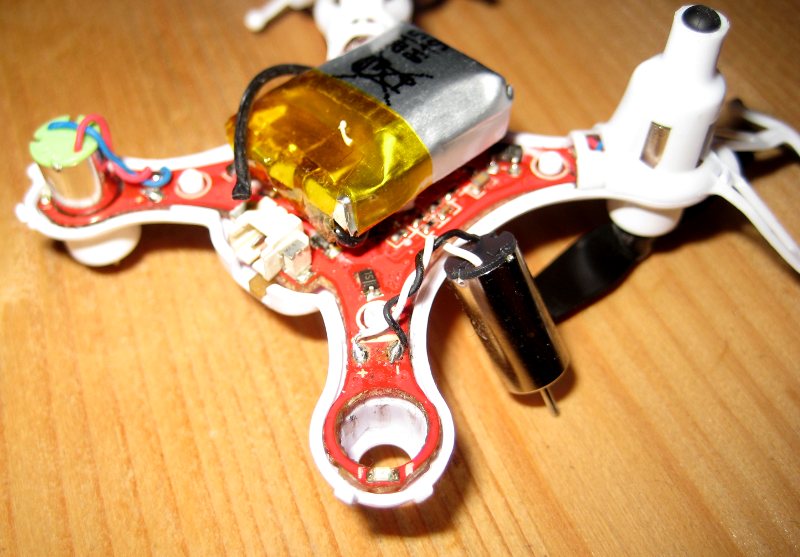
 The Picture above shows the motors ready for removal. They are simply pushed into the chassis (no adhesive is applied) and the two wires are soldered to the PCB. When replacing the motors, make sure to swap it with the correct motor type (The “normal” or counter-spinning motors can easily be distinguished by their wire coloring).
 Finally, reverse the steps above to reassemble the quadcopter again.
Difficulties to look out for
Never rotate the rotors manually
Rotating the motors manually (with your hand or by blowing on the blades) should be avoided. Manually rotating electrical motors induces voltage in the circuity. Although most (good) circuits have protection against this phenomenon, it is good practice not to do so.
Motor cable length
The length of the cables is just enough to push the motors into the mounting positions in the chassis after soldering the wires. However, twisting them is not possible then, which makes the bottom cover plate not fit that easily anymore. So ideally, install the motors first and solder the wires last.
Rotor blade form
Your quadcopter does not lift off after repairing?
Since there are two different motor types spinning in different directions, it is clear that they need different rotor blade forms to create lift (see the exploded assembly drawing shown earlier in this post). The shipped rotor blades came in two different colors (black and white) so I thought that each color marked one of the two rotor forms – why else would there be two black and two white rotors? Well, this was not the case. The rotor color has nothing to do with its form! That was quite confusing to me. So make sure to fit the right rotor blades on each motor.