Building a simple goban (Go board) DIY
I am a big fan of the old Japanese board game Go. Some time ago I wanted to get my own Go game, consisting of a Go board (goban) and black and white stones. Unfortunately, I found out that wooden Go boards are quite expensive, by far exceeding the price range I was willing to pay. Actually, gobans are quite a simple piece of equipment. It is nothing more than a (wooden) board with a grid of 19 x 19 lines on it, why should I pay over 100 euro for it? So I decided to build my own and just buy the stones, which are cheap to come by.
Building a goban is really simple. There are only two things that really need attention: getting the grid on the board and the lengh-to-width ratio. To be correct, there are quite a few other things to take into account, but with my limited tools and options I sticked to the most important basics. If you have the tools and skills you can also honour other parameters of a traditional Japanese Go board, like board and grid line thickness or the exact board width and length. Have a look at the Wikipedia article on Go equipment, but I doubt it will create any added value, as these features will probably stay unnoticed anyway.
Getting the grid on the board
This was the only part that took me a while to find the right solution. How to create the grid on the board in a way that it would not wear off in the future. I saw solutions on the internet were people used a Dremel to carve the lines or were they used a soldering iron to burn the lines into the wood – both solutions gave (in my opinion) bad results. In the end I decided to just draw the lines using an Edding (any other permanent marker should work, too) with a line thickness of about 1 mm and varnish it afterwards. First, I feared that with this solution, the grid would come off soon, but after many months of use (I also use the board as a cocktail table) I noticed no change at all, so this solutions works nicely.
The length-to-width ratio
The Japanese goban is not exactly a square, but has a distinct length-to-width ratio of 15:14. The reason for that ratio is to compensate for our natural depth perception. The whole board should keep that ratio, including the grid. That is why the traditional Go boards are the size of 454,5 mm x 424,2 mm (I used 454 mm x 424 mm for simplicity).
Building the goban
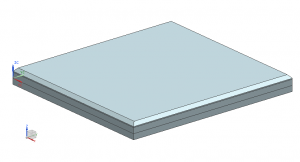
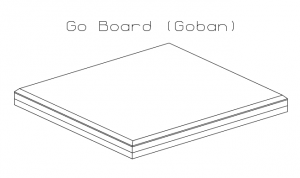
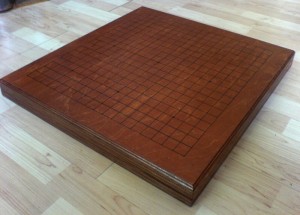
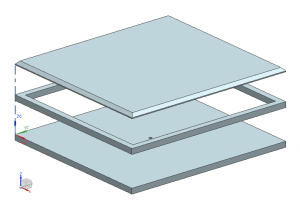
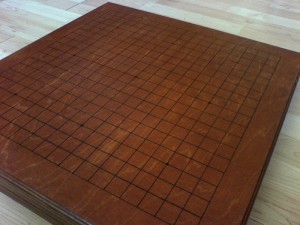
My goban consists of three wooden plates to form an empty cavity in the middle section (see picture above or the CAD drafts at the end of this article). That way it creates a beautiful sound when a stone is placed on the board.
I used three wooden boards:
- Bottom plate: 555 mm x 518 mm x 18 mm, with a hole in the middle (plate 1)
- Middle section: 555 mm x 518 mm x 18 mm, with it’s inner material removed, so that it forms the cavity
- Top board: 555 mm x 518 mm x 13 mm, with chamfers; this is the board on which you place the stones
Please refer to the CAD drafts at the end of this article for detailed construction and assembly drawings. At least for the board on top choose wood with a nice surface, as this is the one you will look at when you play. About the mysterious hole in the bottom board: I do not really know myself why I did this, maybe it is just my habit of never creating any completely sealed cavities.
Once you cut the boards, glue them together. Carefully remove all leftovers from the glue, maybe even plane all four sides of the board afterwards.
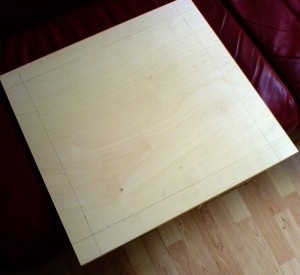
Now draw the 19 x 19 lines grid on the board using a pencil first. The outer frame of the grid is 454,5 mm x 424,2 mm (I used 455 mm x 424 mm for simplicity). Make sure that it is centered and that the orientation matches the one of your wooden board (the lengths and widths are not that much different and can easily be confused). Now divide the length and width of the grid by 18, which should give you approximately a 25 mm and 24 mm line spacing. You should also mark the typical 9 intersections of the goban (see the pictures of the finished goban) with small dots or squares. When you are satisfied with the result, use a permanent marker to draw the lines.
I did not like the tone of the wood I used, so I stained it in a slightly darker tone after I drew the grid.
The final step is to varnish the goban. Choose something that is highly resistant, so that the baord will last a long time. Also, consider varnishing the board several times with small layers, slightly whetting it before each paint. This will make the surface much smoother.
Newly, I put a (plexy)glass plate (exact size depends on the chamfer you used) on top of the goban to protect it when I am not playing. This is only useful when you – like me – also use the goban as a cocktail table when you are not playing. It is not necessary to attach the glass plate to the board in any way, the friction alone is enough to prevent the glass plate from moving.
As always, about the CAD drafts: They are just quick and dirty drawings and not DIN-/ or ISO-compliant whatsoever. Do not expect anything fancy. However, they should provide all necessary details for construction and assembly. All measurements are in [mm]/metric system.
CAD drafts:
