DIY: Building a Japanese shoji-style ambient lamp – the nerd way
This is another old project that I made a while ago. I have to admit, the idea itself is stolen from instructables.com and you can see that the outcome looks similar at first glance. But I wanted to take a different approach. While I really like the shoji-design, I wanted my lamp to be more solid and long-lasting. Besides, I preferred the size (and ratio) of the DIN-A4-format, so that I can easily replace the paper without trimming it first, in case it gets damaged or i want to change the color. It has a beautiful ratio (297 / 210 = √2). The length of the sticks within the frame are chosen in a way that the rectangular pattern on the frame also has a ratio of √2.
With about 15 EUR for all material, you can build a (in my opinion) beautiful lamp of high quality. The building process is very simple, only gluing the wooden sticks together approximately rectangular might be a little tricky.
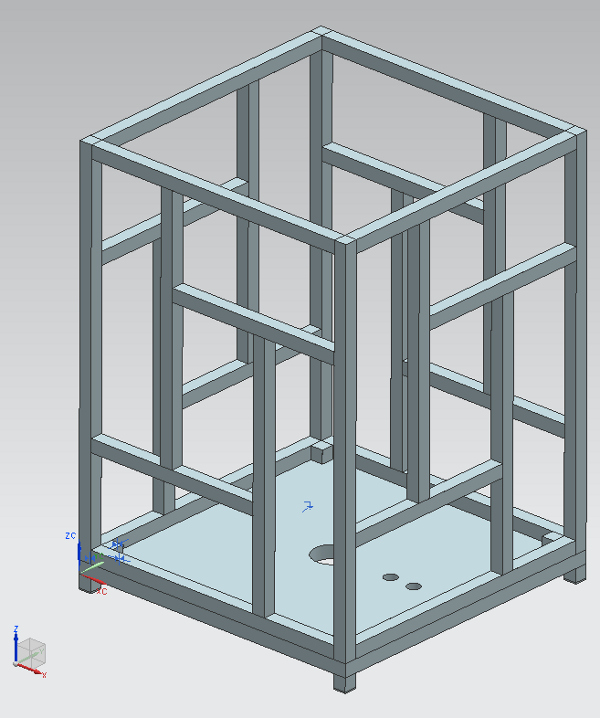
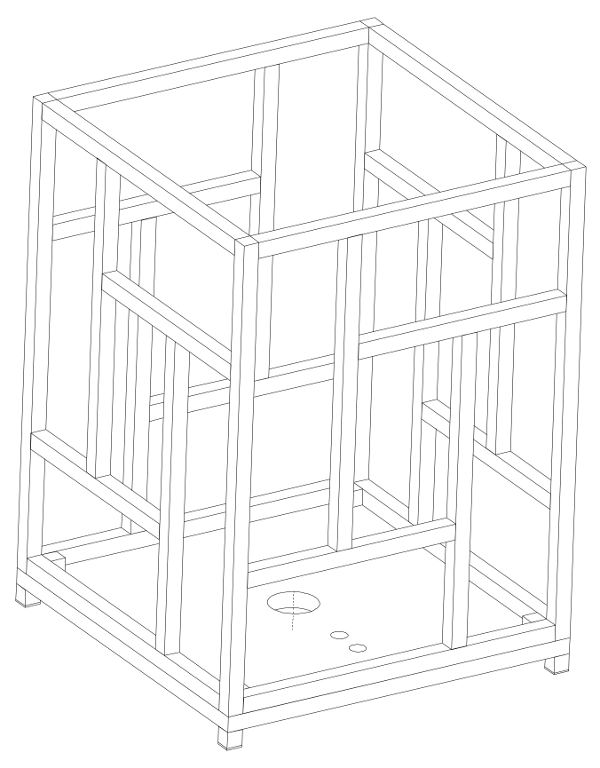
Before I built the actual lamp I made a CAD simulation just for the fun of it. Yes, that is probably overkill but doing it “the nerd way” had several advantages: First I could try out different designs/dimensions/ratios and decide which I liked best before making the lamp. Second I could easily make a technical drawing for this guide. Despite using CAD, do not expect the engineering drawings to be in line with any standard. I did not bother making them properly DIN– or ISO-compliant, but all details needed to build the lamp are included. All measurements are in mm/metric system.
What you need is:
- 1x wooden board (230x230x10)
- 4x wooden sticks with a square profile (10x10x297)
- 8x wooden sticks with a square profile (10x10x210)
- 8x wooden sticks with a square profile (10x10x198)
- 8x wooden sticks with a square profile (10x10x140)
- 8x wooden sticks with a square profile (10x10x10)
- 4x rubber pads (10x10x1)
- wood glue + hot glue + all-purpose adhesive
- 4x DIN-A4 paper
- 1x light bulb socket that can be mounted on the wooden board
- 1x (energy-saving!) light bulb
- 1x power cable
- Zx wood screws
The wood glue of course is needed to build the wooden frame, while you use the all-purpose adhesive to glue the small rubber pads under the base. I used the hot glue to make the paper stick to the wooden frame. Frankly, I could not think of a better solution, but the hot glue does a really good job. It holds the paper in place but it is still possible to remove the paper without any residues of glue. How many screws you need depends on your light bulb socket.
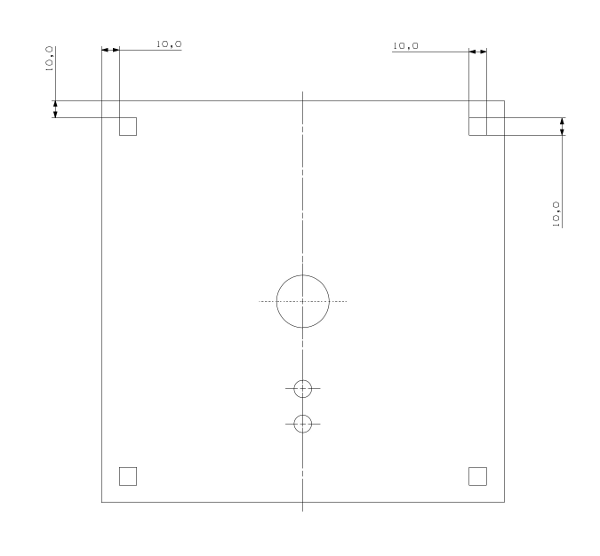
That is all you need. You can easily build the lamp with the CAD-Drafts provided at the end of this article and the pictures below. Keep in mind that the diameter of the hole in the center of the base (see CAD-Drafts) needs to be adjusted to the size of your light bulb socket! Choose any wood you like. I guess dark wood would look nice. I just took the cheapest and did not even painted it.
First get the CAD-Draft from below. Cut the sticks and drill the holes. Sand the edges and make sure all surfaces are plane. Now glue everything together (using clamps, if you can) according to the CAD-Draft. Making the cage out of these small sticks is the hardest part. Try to work accurate, otherwise you will end up with a deformed construction that will not fit on top of your base anymore.
Even if you work very carefully and accurately you will always have tolerances, so you should keep that in mind when you glue the four 10x10x10 cubes onto the upper side of the base. The drawing stats an ideal distance of 10 mm from the edges, but i would add at least 1 mm just to be safe that everything fits together.
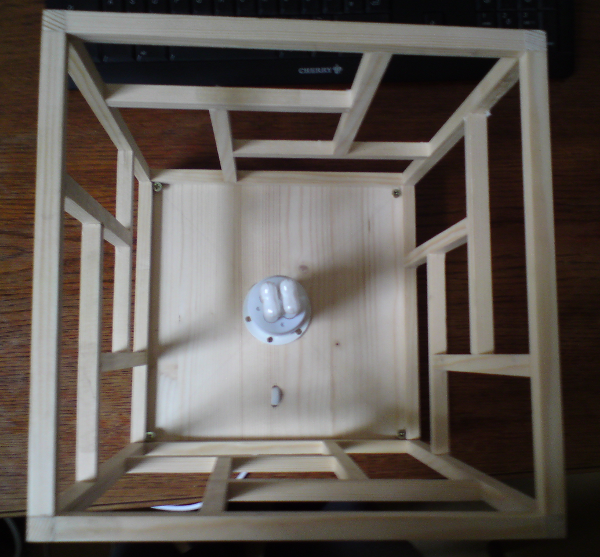
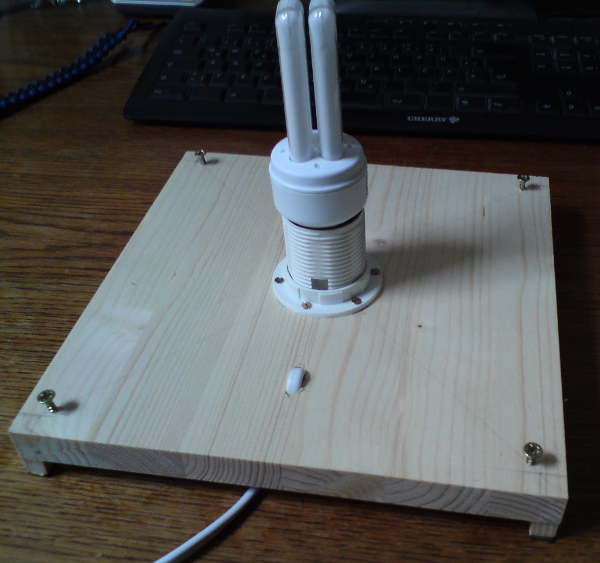
In the picture below you can see that I used screws instead of wooden cubes for my prototype. Now you can also see what the function of the two small holes is. With the wire going through both holes it creates a lot of friction. That way the fragile contacts at the light bulb socket are protected.
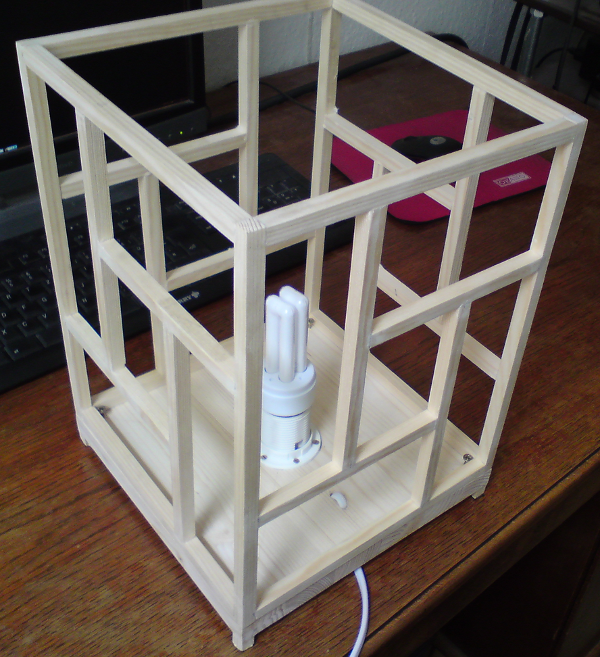
Done! Here my result:

CAD-Drafts: