How to install and configure CherryMusic on a Debian Wheezy (headless) server
This guide explains how to correctly — and more importantly cleanly — install CherryMusic on a (headless) server running Debian Wheezy — without polluting the operating system in any way. For Arch Linux or a more generic installation see the CherryMusic Arch Linux wiki page and CherryMusic’s own wiki on GitHub.
At home I use a Raspberry Pi running Raspbian (≈Debian Wheezy) as an audio server. With about 3 W the Raspberry Pi draws very little power, consequently it is not as crafty as other home server. But it is still capable of doing exactly what I want: streaming music to each room in my apartment and over the internet, so I can always listen to my music collection, no matter where I am.
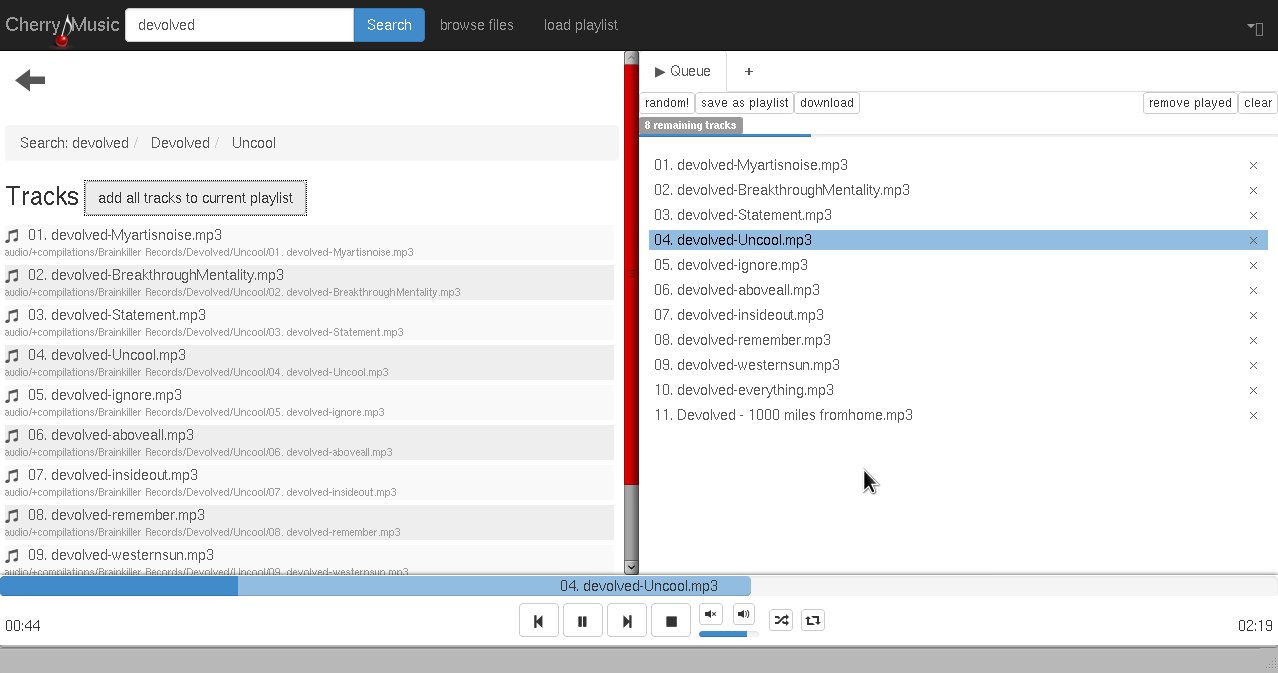
This is made possible by CherryMusic, a HTTP streaming server that has very little system requirements and therefore runs beautifully on the Raspberry Pi. Unlike MPD, Icecast and the like, CherryMusic does not only provide a simple audio stream, but comes with a feature-rich multi-user web app, that allows multiple users to log in at the same time using only a standard browser. After login, each user can prepare/manage playlists and listen to his/her own individual playlist — in contrast to that, MPD, Icecast and the like only provide one audio stream for all users. CherryMusic is much more flexible. Like most other audio players, CherryMusic supports most of the audio file standards and has build-in on-the-fly transcoding.
For this guide I assume you have an up and running Debian Wheezy server in your LAN, which has access to your music collection. This is enough to stream music to any place in your home where you can access your LAN. If you further wish to listen to your music collection remotely from anywhere, you need remote access to your server over the internet. With a home server and a normal internet connection that is possible via dynamic DNS. Either see the poor man’s DNS article on this blog or search the internet on how to setup dynamic DNS.
Installation
CherryMusic depends on Python. Although it also runs with Python 2, Python 3 is recommended for best performance and all features. To install Python 3, issue:
# aptitude install python3
CherryMusic has several optional dependencies, which should be installed for a seamless user experience:
# aptitude install mpg123 faad vorbis-tools flac imagemagick lame python3-unidecode
Optionally, you can replace the packages “mpg123”, “faad”, “vorbis-tools”, “flac” and “lame” with “ffmpeg” if you like. The advantage with ffmpeg is that you can also decode WMA files. If you are not running a headless server, consider installing “python3-gi”, which allows you to use CherryMusic’s GTK system tray icon.
Actually, two more dependencies (one of them optional) are needed. This will be handled later in this guide.
Configuration and setup
For security reasons it it highly recommended to run CherryMusic under a dedicated Linux user. First, create the user “cherrymusic”:
# adduser cherrymusic
The easiest way to get the latest CherryMusic code and to update CherryMusic regularly is to use Git. Install Git with:
# aptitude install git
Now, switch to the newly created user:
$ su cherrymusic
CherryMusic is not in the Debian Repositories and does not provide a Debian package yet. This is no problem though, as you do not need to install it. You can simply run it from the downloaded directory. There are two branches of CherryMusic: the stable main release (“master”) and the development version, called “devel”. I highly recommend the development branch, as it often is several steps ahead of the master release and provides all the new features. In this guide I also chose the devel branch. However, if you insist on using the master release, simply replace all occurrences of “devel” with “master”.
Now, get CherryMusic:
$ git clone --branch devel git://github.com/devsnd/cherrymusic.git ~/cherrymusic-devel
This command will download the develop branch of CherryMusic and place it in a directory, called “cherrymusic-devel” in your home directory.
Due to a shortcoming in Debian, the repositories do not provide a recent version of the package “cherrypy” and the package “stagger” is not available in the Debian repositories at all. However, they can be fetched locally and simply put into the CherryMusic directory. CherryMusic has a build-in function, that checks if those two packages are available on the operating system and if necessary offers to automatically download and store them locally in the CherryMusic directory — without installing them on your system. This provides a clean way to get CherryMusic running on Debian. Simply change to the CherryMusic directory and start the server application with the “–help” switch (you will be prompted then):
$ cd cherrymusic-devel
$ python3 ./cherrymusic --help
Now, do the initial start-up to generate the configuration and data files in your home directory:
$ python3 ./cherrymusic
This creates the configuration file “~/.config/cherrymusic/cherrymusic.conf” and the directory “~/.local/share/cherrymusic/”, where the user data is stored.
Before you head on, make the necessary changes in the configuration file (e. g. using “nano”):
$ nano ~/.config/cherrymusic/cherrymusic.conf
Edit this file to your preferences… and do not forget to set the path to your music collection. To be more flexible, I recommend to set the “basedir” path to “/home/cherrymusic/.local/share/cherrymusic/basedir” and only create symlinks in that directory, pointing to the location of your music. That way, you can add music from different locations to CherryMusic.
$ mkdir ~/.local/share/cherrymusic/basedir
$ ln -s PATH_TO_MUSIC_COLLECTION ~/.local/share/cherrymusic/basedir/MUSIC_COLLECTION_1
Replace “PATH_TO_MUSIC_COLLECTION” with the absolute path to your music collection and instead of “MUSIC_COLLECTION_1” choose a name for your music collection. Repeat the last command if you wish to add music from other locations.
CherryMusic uses a database to search and access files in your music collection. Before you can use CherryMusic, you need to do an initial file database update:
$ python3 ./cherrymusic --update
To reflect changes in your music collection, you need to repeat this step every time you make changes to your music collection. If you have a not that powerful server (like the Raspberry Pi, that I use) and a large music collection, it may be wise to do the initial database update on a more powerful machine. On a standard computer, even very large music collections should not take longer than a few minutes.
Finally, start CherryMusic in a GNU Screen session:
$ screen
$ python3 ./cherrymusic
Press [CTRL] + [a] and then [d] to detach from the GNU Screen session. To switch back to your normal user, do:
$ exit
Open a web browser on a computer connected to the same LAN the CherryMusic server is in and go to “IP:PORT”, where “IP” is the IP of the server and “PORT” the port specified in the CherryMusic configuration file (defaults to “8080”).
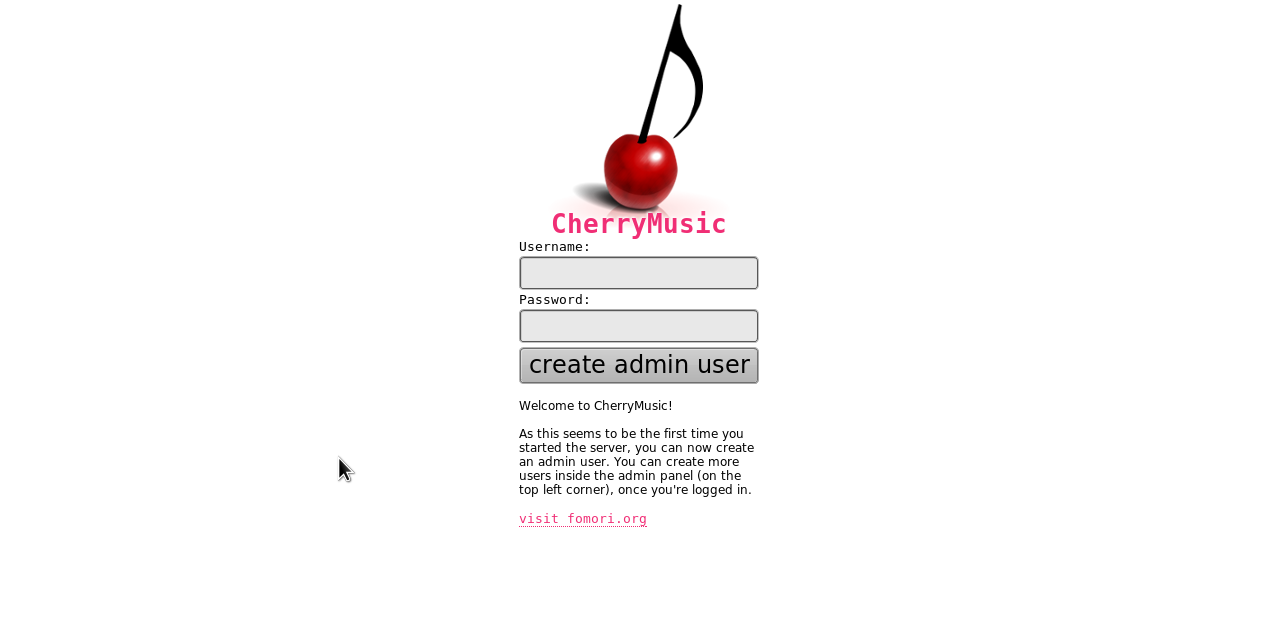
Create an admin user and the basic setup is done.
Fine-tuning
Scripts and autostart
For simpler handling of CherryMusic, I wrote the following two scripts, which automate the process of starting and updating CherryMusic after the above guide was followed.
Script to start CherryMusic at boot and any other time needed:
cherrymusic-start.sh
#!/bin/bash
#
# starts cherrymusic in a screen session (workaround, until init.d script is available).
# use absolute paths, because this script also runs at startup, where $PATH may not be loaded yet.

# variables
CHERRYMUSIC_BRANCH=devel
CHERRYMUSIC_DIR=cherrymusic-$CHERRYMUSIC_BRANCH
CHERRYMUSIC_PATH=/home/cherrymusic/$CHERRYMUSIC_DIR
SCREEN_SESSION=cherrymusic
PYTHON_PATH=/usr/bin/python3
SCREEN=/usr/bin/screen
GREP=/bin/grep
ECHO=/bin/echo

###

# check if cherrymusic is running in screen and stop it if it does
CHERRYMUSIC_SCREEN=`$SCREEN -ls | $GREP -E "[0-9]{1,5}\.$SCREEN_SESSION.+\(Detached\)$"`
$ECHO "# checking if cherrymusic is currently running in a screen session..."
if [ -n "$CHERRYMUSIC_SCREEN" ]; then
    $ECHO "-> cherrymusic is running in a screen session:"
    $ECHO "\"$CHERRYMUSIC_SCREEN\""
    # kill screen session that cherrymusic runs in
    $ECHO "-> killing screen session that cherrymusic runs in..."
    $SCREEN -X -S $SCREEN_SESSION quit
else
    $ECHO "-> cherrymusic not running, good."
fi

# cd to cherrymusic directory and start it with screen+python
cd $CHERRYMUSIC_PATH
$ECHO "start cherrymusic in screen session \"$SCREEN_SESSION\"..."
$SCREEN -d -m -S $SCREEN_SESSION $PYTHON_PATH "./cherrymusic" # use "-L" to log screen session in current directory to see whats going on (e.g. debug)

exit 0
Script to update CherryMusic:
cherrymusic-update.sh
#!/bin/bash
#
# updates cherrymusic.

# variables
CHERRYMUSIC_BRANCH=devel
CHERRYMUSIC_DIR=cherrymusic-$CHERRYMUSIC_BRANCH
#ARGPARSE_VER=1.2.1
#ARGPARSE_DIR=argparse-$ARGPARSE_VER
#ARGPARSE=argparse.py
#ARGPARSE_URL=https://argparse.googlecode.com/files/$ARGPARSE_DIR.tar.gz
SCREEN_SESSION=cherrymusic
GIT_URL=git://github.com/devsnd/cherrymusic.git
CHERRYPY=cherrypy
STAGGER=stagger
CHERRYMUSIC_START=cherrymusic-start.sh

###

# make home directory the working directory
echo "# enter home directory..."
cd $HOME

# check if directory $CHERRYMUSIC_DIR (sources) exists and either (check for updates and) backup + pull or clone the sources
echo "# checking if $CHERRYMUSIC_DIR sources exist..."
if [ -d $CHERRYMUSIC_DIR ]; then
    echo "-> directory \"$CHERRYMUSIC_DIR\" exists, good."
    # first, check if cherrymusic is up to date
    cd $CHERRYMUSIC_DIR
    GIT_STATUS=`git fetch --dry-run 2>&1` # "2>&1" because git fetch writes to sterr
    cd ..
    echo "# checking if cherrymusic is up to date..."
    if [ -n "$GIT_STATUS" ]; then
        echo "-> cherrymusic is not up to date. starting update..."
        # check if cherrymusic is running in screen and stop it if it does
        CHERRYMUSIC_SCREEN=`screen -ls | grep -E "[0-9]{1,5}\.$SCREEN_SESSION.+\(Detached\)$"`
        echo "# checking if cherrymusic is currently running in a screen session..."
        if [ -n "$CHERRYMUSIC_SCREEN" ]; then
            echo "-> cherrymusic is running in a screen session:"
            echo "\"$CHERRYMUSIC_SCREEN\""
            # kill screen session that cherrymusic runs in
            echo "-> killing screen session that cherrymusic runs in..."
            screen -X -S $SCREEN_SESSION quit
        else
            echo "-> cherrymusic not running, good."
        fi
    else
        echo "-> cherrymusic is already up to date. exiting..."
        exit 0
    fi
    # remove old backup, make new backup
    echo "-> backup \"$CHERRYMUSIC_DIR\" to \"$CHERRYMUSIC_DIR-backup\"..."
    rm -rf ./$CHERRYMUSIC_DIR-backup
    cp -r $CHERRYMUSIC_DIR $CHERRYMUSIC_DIR-backup
    # get newest pull from github
    echo "-> pulling sources..."
    cd $CHERRYMUSIC_DIR
    git pull
    cd ..
else
    echo "-> directory \"$CHERRYMUSIC_DIR\" not found."
    # get newest version from github
    echo "-> cloning sources..."
    git clone --branch $CHERRYMUSIC_BRANCH $GIT_URL $CHERRYMUSIC_DIR
fi

#
# the part commented out below is only relevant for python 2. if you happen to use python 3, comment in the part below again.
#

# check if argparse exists
#echo "# checking if argparse exists..."
#if [ -d $ARGPARSE_DIR ]; then
#    echo "-> $ARGPARSE is already downloaded, good."
#else
#    echo "-> need to download $ARGPARSE_DIR."
#    # download $ARGPARSE
#    echo "-> download argparse from \"$ARGPARSE_URL\"..."
#    wget $ARGPARSE_URL
#    echo "-> extracting $ARGPARSE_DIR.tar.gz..."
#    tar -xvf $ARGPARSE_DIR.tar.gz
#fi

# check if $ARGPARSE is already in place, if not copy it
#echo "# checking if \"$ARGPARSE\" already is in place..."
#if [ -e $CHERRYMUSIC_DIR/$ARGPARSE ]; then
#    echo "-> \"$ARGPARSE\" already in place, good."
#else
#    echo "-> \"$ARGPARSE\" not found."
#    # copy $ARGPARSE into place
#    echo "-> copy \"$ARGPARSE\" into place..."
#    cp $ARGPARSE_DIR/$ARGPARSE $CHERRYMUSIC_DIR
#fi

# start cherrymusic. first start up to fetch cherrypy and stagger locally
echo "# checking if cherrypy and stagger are installed (locally)..."
if [ ! -d $CHERRYMUSIC_DIR/$CHERRYPY ] || [ ! -d $CHERRYMUSIC_DIR/$STAGGER ]; then
    echo "-> cherrypy and/or stagger not found."
    echo "-> start cherrymusic (with --help) to get cherrypy and/or stagger..."
    python3 $CHERRYMUSIC_DIR/cherrymusic --help
else
    echo "-> cherrypy and stagger already in place."
fi

# start cherrymusic. this time in a screen session
echo "# update finished."
echo "-> now, start cherrymusic in a screen session with \"$CHERRYMUSIC_START\" script!"

exit 0
Copy and paste both scripts and name them “cherrymusic-start.sh” and “cherrymusic-update.sh” respectively.
Make them executable and change their owner to the user “cherrymusic”:
$ chmod 700 cherrymusic-start.sh
$ chmod 700 cherrymusic-update.sh
$ chown cherrymusic cherrymusic-start.sh
$ chown cherrymusic cherrymusic-update.sh
To have CherryMusic automatically started on system bootup (e. g. between reboots), add the following to “/etc/rc.local” (issue “$ nano /etc/rc.local”):
# start cherrymusic server
/bin/su cherrymusic -c "/bin/bash /home/cherrymusic/cherrymusic-start.sh"
Make sure to add the above two lines before “exit 0” at the bottom of the file.
Be aware, that at the moment this is only a workaround, as I am too lazy to create a proper init.d script, which makes sure that the CherryMusic service is always up and running.
Anyway, now you can effortlessly update and start/restart CherryMusic within seconds with your normal user in Debian.
To get the latest CherryMusic version, do:
$ sudo -u cherrymusic /bin/bash /home/cherrymusic/cherrymusic-update.sh
To start/restart CherryMusic, do:
$ sudo -u cherrymusic /bin/bash /home/cherrymusic/cherrymusic-start.sh
SSL-encryption
If you have set up dynamic DNS and enabled port forwarding on your router at home, you should already be able to remotely stream music over the internet with your CherryMusic server. However, your login data and music stream is sent unencrypted. For more security, I highly recommend to set up secure connections with OpenSSL. The downside is, that every time you connect to your CherryMusic server, your browser will complain, that the connection is untrusted since our SSL certificate is self-signed and not by an authority (which would cost money).
For remotely accessing CherryMusic over the internet, you should forward the following ports on your router:
- For CherryMusic, port 8080 (default) — to allow CherryMusic access over the internet.
- For CherryMusic with SSL, port 8443 (default) — to allow CherryMusic SSL access over the internet.
Now install and configure OpenSSL and generate a self-signed certificate (to be able to use SSL encryption):
# aptitude install openssl
Install “ssl-cert” to have the SSL stuff set up correctly, especially the group “ssl-cert”:
# aptitude install ssl-cert
Next, add the CherryMusic user to the group “ssl-cert”, to have permissions to read the later generated private key file:
# usermod -a -G ssl-cert cherrymusic
Finally, we need to generate the private key and certificate files. This is quite a complex topic, so this guide will just walk you through the steps to get a working basic configuration — without giving much explanation. It is based on this article.
The following steps need to be done as root, so switch users:
$ su
Generate the files in a save place, e. g. the root home directory:
# cd /root
Create a safe directory to generate the keys and certificates and enter it:
# mkdir ssl-certificates
# cd ssl-certificates
Generate a private key:
# openssl genrsa -des3 -out server.key 1024
Create a certificate signing request (CSR). it is important that “Common Name” is filled in with the fully qualified domain name of the server to be protected by SSL: The “Common Name” must be (or the IP address must resolve to) the server name your clients use to contact your host. If this does not match, every time your clients connect to the server they will get a message asking them if they really want to use this server. Since you probably do not have a static IP from your internet provider anyway, but use dynamic DNS and a self-signed SSL certificate instead, do not bother too much. With dynamic DNS and a self-signed SSL certificate, your IP will still change often and your browser will not recognize the certificate. So you will get this security warning in your browser anyway — no matter what you enter in the “Common Name” field.
# openssl req -new -key server.key -out server.csr
Backup the original generated private key file:
# cp server.key server.key.original
Remove the pass phrase from the key file, so that Apache HTTP Server does not ask for the pass phrase every time it gets restarted (That way Apache starts with SSL after a reboot/crash, provided you use Apache):
# openssl rsa -in server.key.original -out server.key
Generate a self-signed certificate, valid for 10 years:
# openssl x509 -req -days 3650 -in server.csr -signkey server.key -out server.crt
Make sure, the (unencrypted) private key file (“server.key”) and the rest is owned and only readable by the owner “root” and the group “ssl-cert”:
# chown root:ssl-cert ./server.*
# chmod 640 ./server.*
Copy the private key file and the signed certificate into place (“-a” to preserve the owner, group and permissions):
# cp -a ./server.key /etc/ssl/private
# cp -a ./server.crt /etc/ssl/certs
Log out from the root acount:
# exit
Done. Last, configure CherryMusic to use SSL. For that, edit CherryMusic’s configuration file again (e. g. using “nano”):
$ nano ~/.config/cherrymusic/cherrymusic.conf
and change the following lines accordingly:
[...]
ssl_enabled = True
[...]
ssl_certificate = /etc/ssl/certs/server.crt
[...]
ssl_private_key = /etc/ssl/private/server.key
[...]
Now, when you connect to CherryMusic, you should automatically be redirected to the SSL port and therefore have a secure connection. Your browser will complain about the untrusted connection and you will have to temporarely add an exception everytime you connect to CherryMusic. That can be annoying, I know, but it is the safest way.


