Samsung Galaxy S3 repair – Glass screen/digitizer replacement and why it is not recommended
 A friend asked me to repair her friends Samsung Galaxy S3 mobile phone, that had a broken glass screen/digitizer, so I had a closer look at it. The process of replacing the glass screen/digitizer on a Samsung Galaxy S3 is straight forward and not many tools are needed. However, what you really need is patience… a lot of it.
This post shows how it is done and why I still would not recommend it anyway.
Please note the difference between a broken glass screen/digitizer and a broken display! The display is the actual electronic part, while the glass screen/digitizer is… well, just a glass screen glued on top of the real display. A broken display can also be repaired (=replaced), but since the display essentially “is” the mobile phone (with most parts soldered onto it as SMDs) it makes no economic sense — buying a new phone would be the right way to go here.
Also be advised, that these instructions can — if not applied correctly — lead to a (completely) broken and unusable phone. You do this at your own risk!
Replacing the glass screen/digitizer
Technically, replacing the glass screen/digitizer is very easy: all you need is the replacement part (make sure it ships with the necessary adhesive included!), a hairdryer, tweezers, alcohol (~70% ethanol) and a deck of cards (you probably get the wrong impression now, so please read on 😉 ).
Simply put, the display is mounted into the casing with some industrial grade adhesive. The same adhesive is used to merge the glass screen/digitizer with the display (with a layer in between). This adhesive effect can be reduced by applying moderate heat.
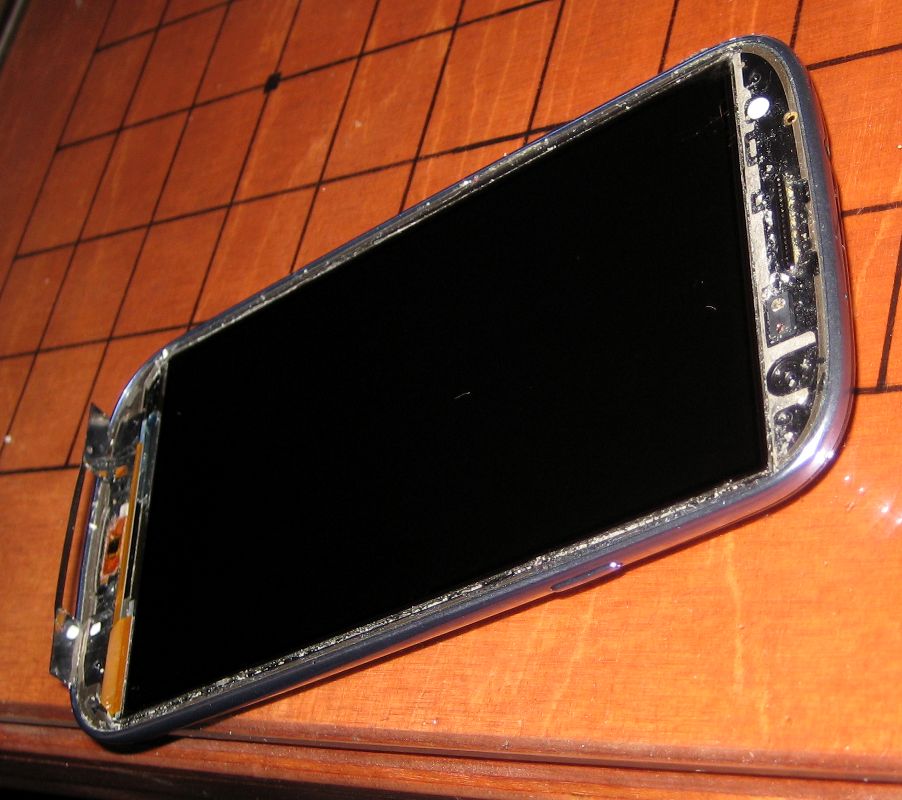
Start by removing the back cover and the battery. Then gently apply (moderate) heat with the hairdryer at the top front, but be careful not to heat it up too much. Then start fiddling a card from your card deck (I used a laminated business card) between the glass screen/digitzer and the case. In this initial step, it might be better to use a razor blade (be careful!) just to open the first gap to insert a card. Only use non-scratching tools (like a card) from here on to protect the display. Also make sure to start at the top front on the left side (see figure below). This is the least sensitive region of the screen.
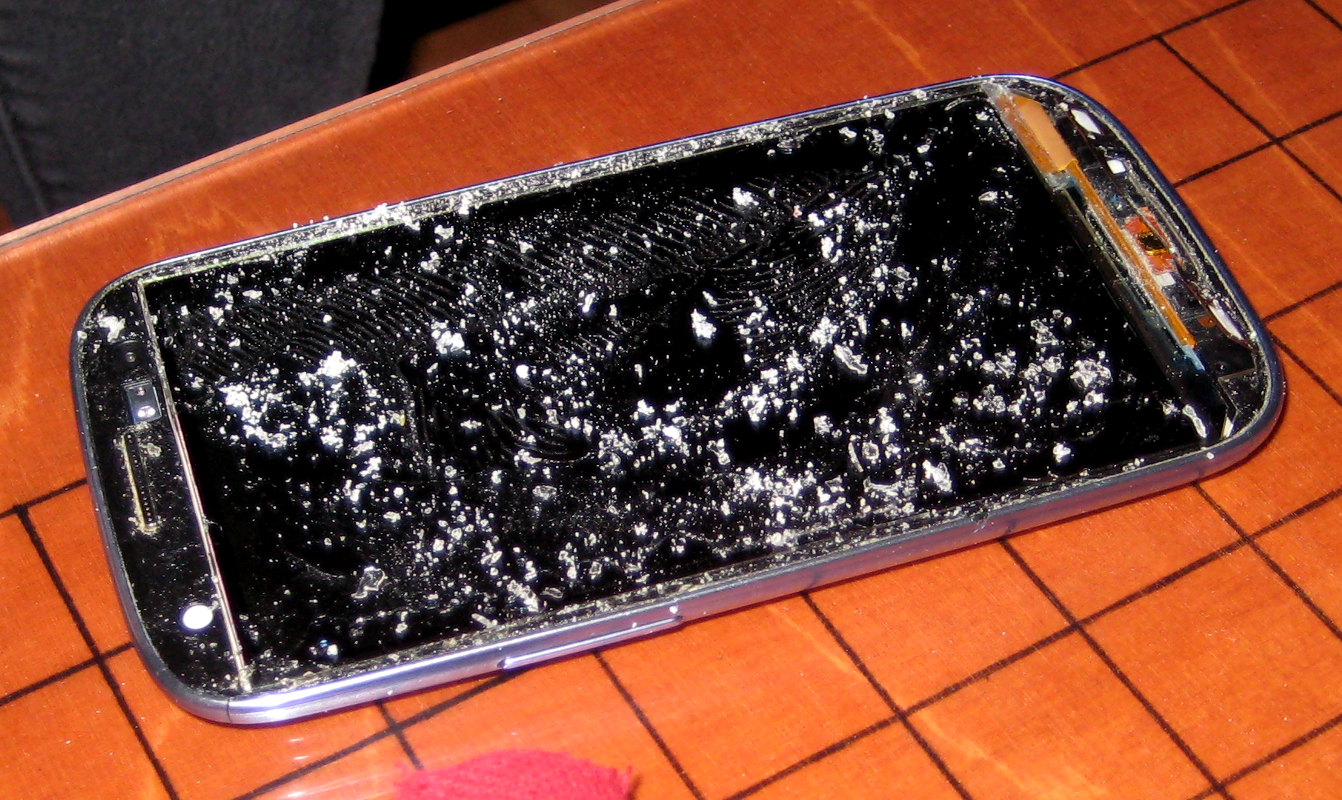
 Now work your way downwards to the bottom of the screen with the same procedure: heat up a small area of the screen and then gently push down the card a little further. Be very very patient and careful during these steps! It takes quite a long time to completely remove the glass screen/digitizer (it took me about an hour) and only a little too much pressure or not enough heat will break the display underneath, in which case the phone will be trash. Often, you can barely hear/see the display crack. If you are not sure if your display is still functional just put the battery back in and turn it on — if it is broken stop right there and save the trouble of dismantling the phone any further.
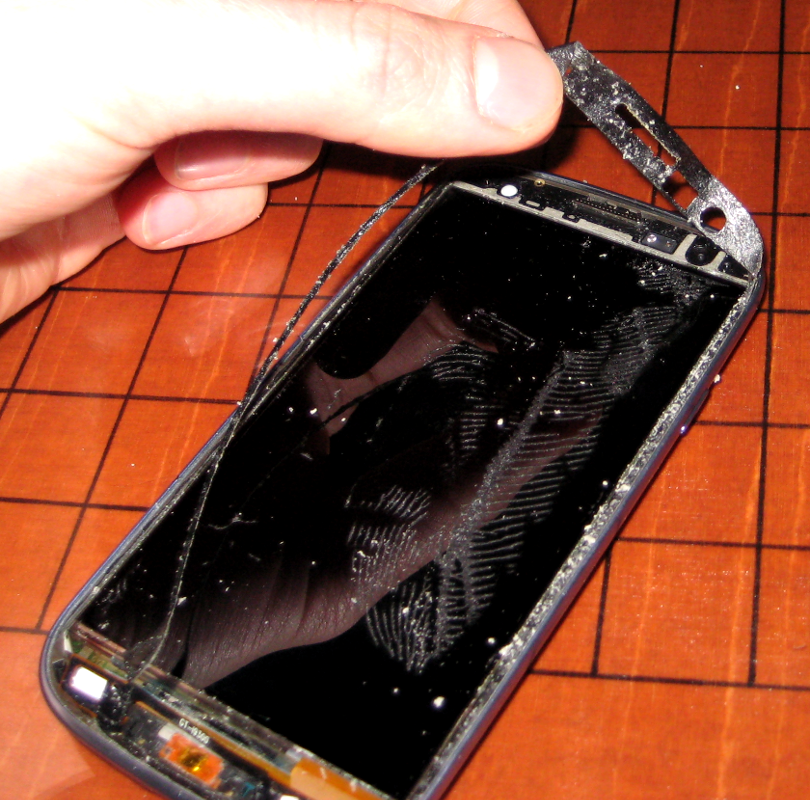
Once you reach the area with the three buttons at the bottom, work your way around them. you will notice that the touch buttons are also glued to the glass screen/digitzer and connected via a flex cable. This is the most tricky part, as it is too easy to rip them off.
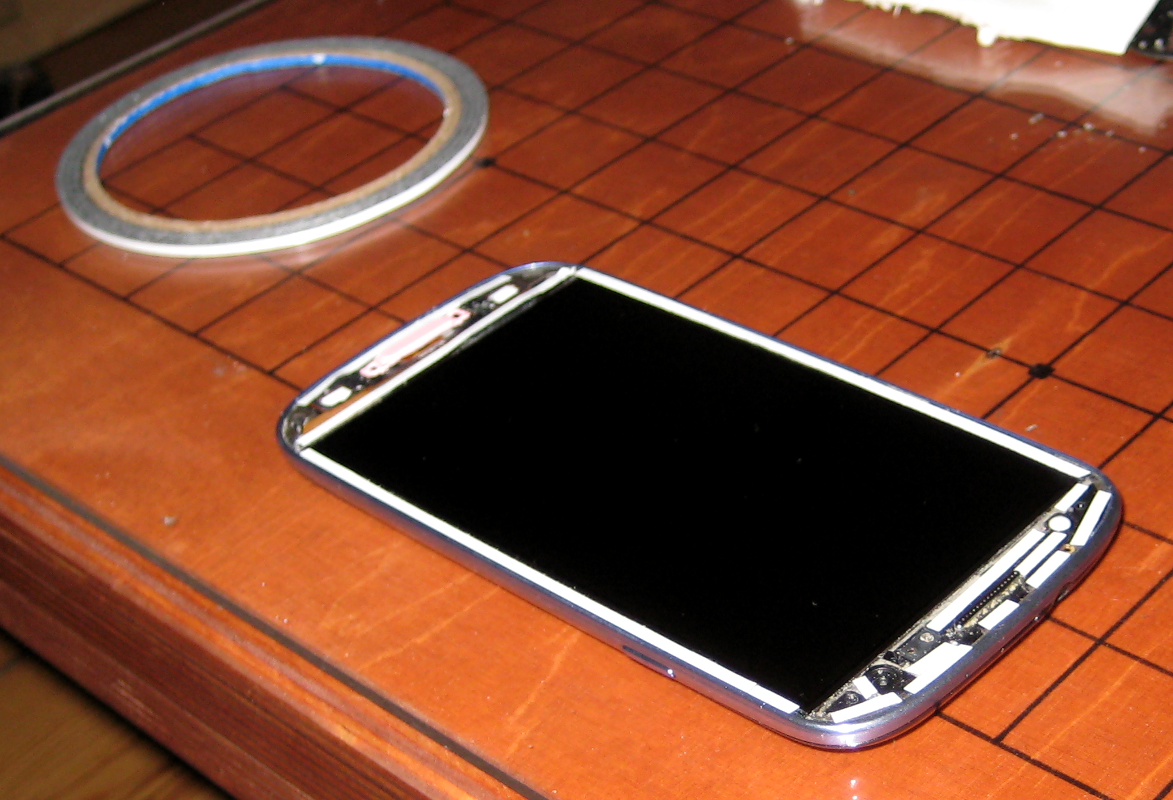
Now, remove the black rubber seal from the fringe.
 Then remove all the adhesive that is left on the display and clean the display with ethanol and a (antistatic) cloth.
 Once the display and the surrounding fringe are completely free of adhesive, place small stripes of adhesive tape (the one that was shipped with the replacement part) around the display. Fill as much surface around the display with adhesive as possible. Tweezers can be of great help here.
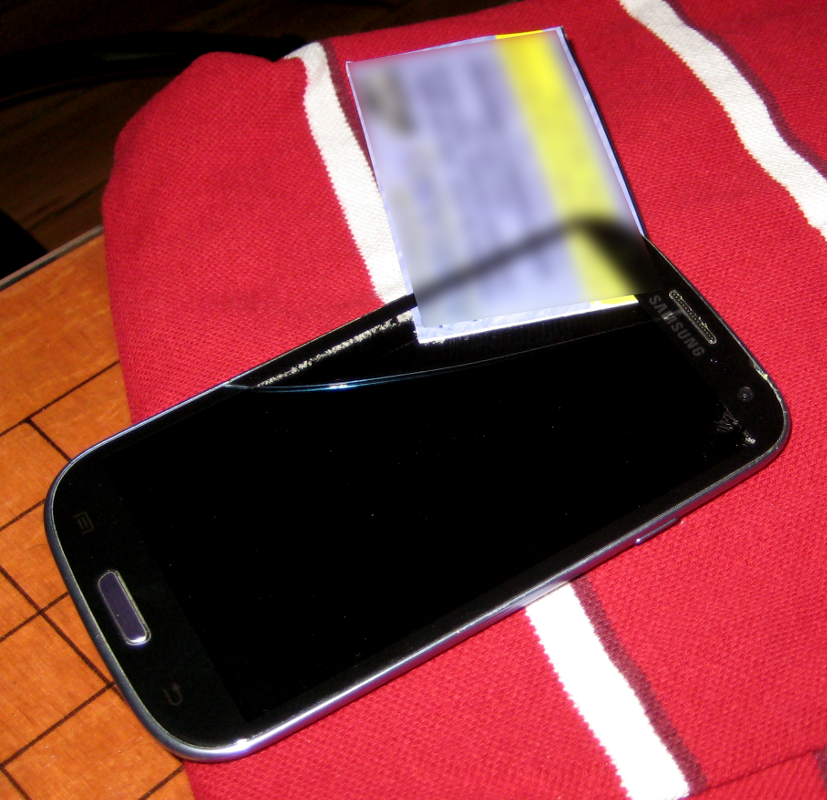
 Finally, remove all protective foil from the adhesive tape stripes and the one at the bottom of the replacement glass screen/digitizer. Make sure the display is completely free of any dirt particles and the three buttons are in place and carefully place the new glass screen/digitizer onto the display, beginning at the top using the notch for the speaker as reference point. Once the glass screen/digitizer and display are aligned perfectly, apply moderate pressure to merge both parts.
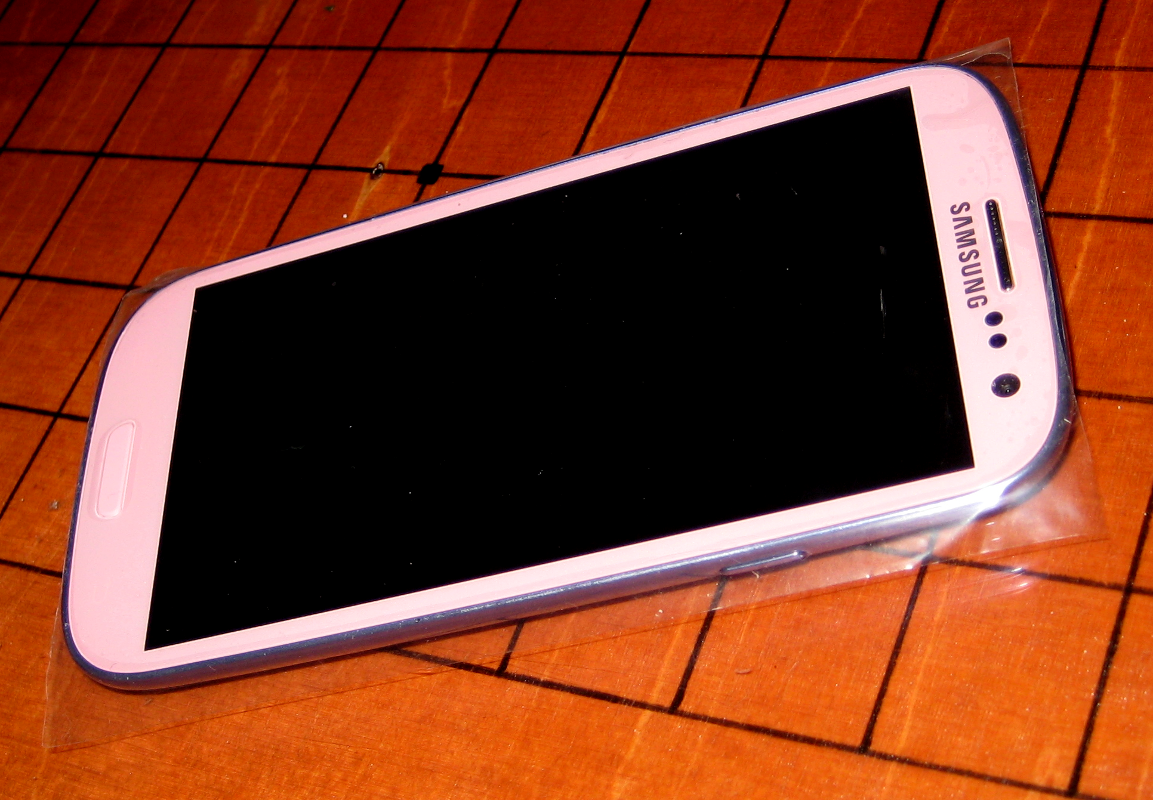
Please do not ask why the replacement is pink!^^
Still working… and why it is not recommended
This repair method is quite tricky and can easily destroy your phone. I also broke the display of the first mobile phone I tried to repair.
Also, on a new device, the adhesive layer between the glass screen/digitizer and the display covers the whole display area, not only the fringe. Most standard/cheap replacements (like the method shown here) are applied with adhesive tape, rather than the liquid adhesive that also covers the display area. With the lack of that adhesive layer between glass screen/digitizer and display, a thin, empty gap between both remains. Pressing down on the screen with a little more pressure locally produces strange artifacts, much like pressing on the screen of a notebook. This by the way is an easy method to find out if the glass screen/digitizer was replaced in a cheap manner on a second hand device.
While this mobile phone model is not waterproof to begin with, this repair method reduces it’s water resistance even further. The cheap adhesive tape seals the phone even worse than the original adhesive.
So if the glass screen/digitizer shows only small cracks with the touch functionality still working and the display still readable, better use the phone as it is. On the other hand, if the glass screen/digitizer is severely scattered, this might be a cheap solution to make the phone working again.
You have been warned!